Bigbluebutton Virtual Classroom
If you would like to demo this virtual classroom, please visit http://www.learntobe.org/demo
In this document, we will help you ensure that your audio/video are working properly in our virtual classroom and show you key features that will help you during tutoring sessions.
REQUIREMENTS
-
Use modern browsers: Firefox, Chrome* and Safari**.
-
Have headphones and a microphone ready so you can setup your microphone properly. Wearing headphones also eliminates echo during the tutoring session.
-
Have high speed internet. Check your internet speed here: http://www.speedtest.net. Click "Begin Test" and wait about 30 seconds. You should see three numbers: the ping, the download speed and the upload speed. Download and upload speeds should be >= 2 Mbps and 1 Mbps in order to have high quality sessions.
-
(OPTIONAL) Have a graphics tablet (we recommend this one: http://www.amazon.com/Wacom-Bamboo-Capture-Tablet-CTH470/dp/B005HGBEZ2). These tablets really improve the quality of your sessions by allowing you to write ideas without using your mouse.
-
- some users have reported they are spontaneously kicked out of our virtual classroom when using Chrome. Test it out and if this happens, then use another browser.
** - Safari does not offer enhanced audio options for users. Both firefox and Chrome do offer this to their users.
SETTING UP AUDIO/VIDEO
Upon entering the classroom, you should see the following popup:
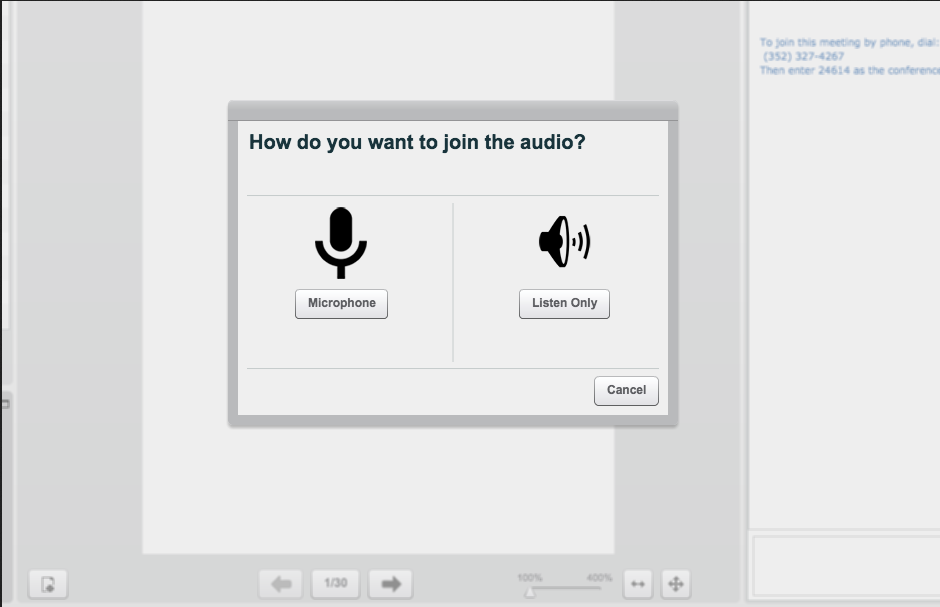
Click on Microphone.
Based on the browser you are using, you will see the following:
CHROME USERS
You will see:

Click on "Allow" in the top right to allow access to your microphone.
FIREFOX USERS
You will see:

Select your microphone and click on "Share Selected Device" to allow access to your microphone.
SAFARI USERS
You will see:
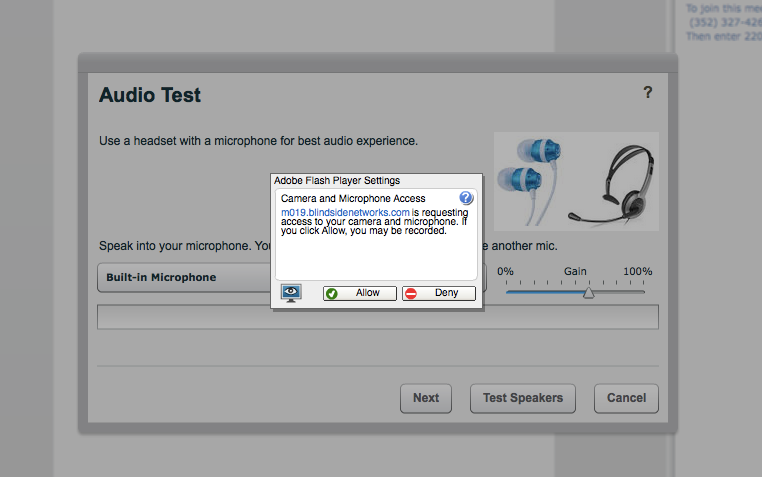
Click on "Allow" to allow access to your microphone. Then follow the directions on the first screen and click "Next".
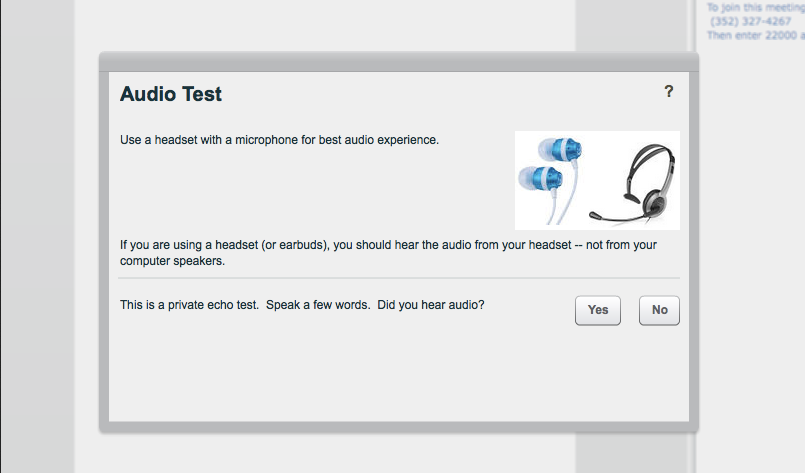
- On the echo test page, speak a few words and check to see that you can hear your voice. If you can, click "Yes". If you can't, click "No" and follow the directions for SAFARI users above.
- As a sanity check, after completing this process look at the Users box (in the top left) of the virtual classroom:
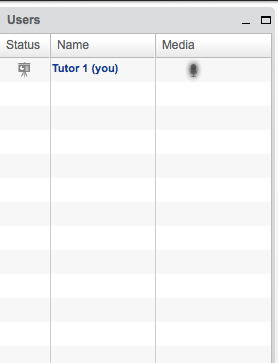
If your microphone is working, you will see the microphone icon light up as you speak. If it does not, try the process again, by clicking on the microphone icon in the top left TWICE (it should currently have green check on it. Click once to turn off your audio and then once more to go through setup).
Key Features
Top Toolbar Buttons
Look to the top left of the virtual classroom. Along the top, you should see 4 buttons like this:

- In the top left should be the Headset button (with a green check mark if you setup your audio from above). If you ever need to reset your audio, you can uncheck this button and then click it again to start over.
- Next to this is a Pencil button (also with a green check by default). The green check means that your student has the ability to write on the whiteboard at the same time as you. We've never had this issue since our students are pretty awesome, but if you find your student doodling and not paying attention, you can uncheck this and they will lose the ability to write.
- The third button is the Webcam button. Click this and if you have a webcam available, you will be able to share your video.
4.Finally, the long button with the microphone is another way to mute yourself. Click it to mute your mic. Also, when you speak you will see this mic light up.
Presentation Area
The presentation area is the blank whiteboard area where you and your student can write out ideas. You can use the vertical toolbar to the right to perform various tasks on the whiteboard like write with the freehand pencil, draw out geometry tools, etc. See below for more detail on the vertical toolbar.
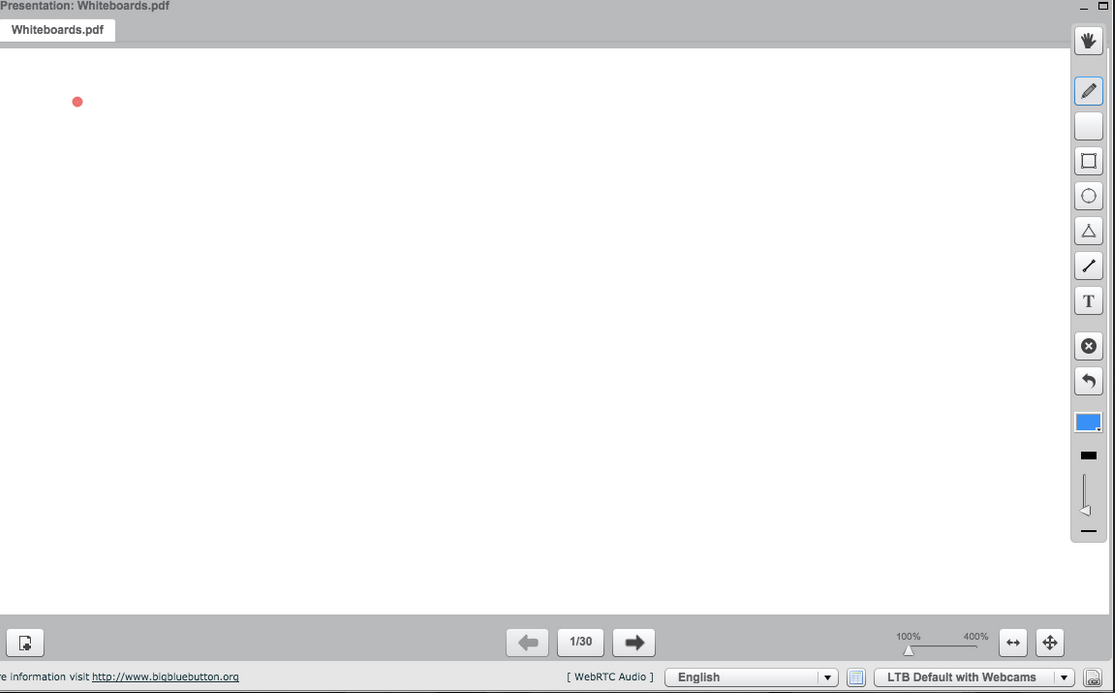
Using the whiteboard tools
If you hover over the presentation area (aka the whiteboard area), you will see a set of tools:
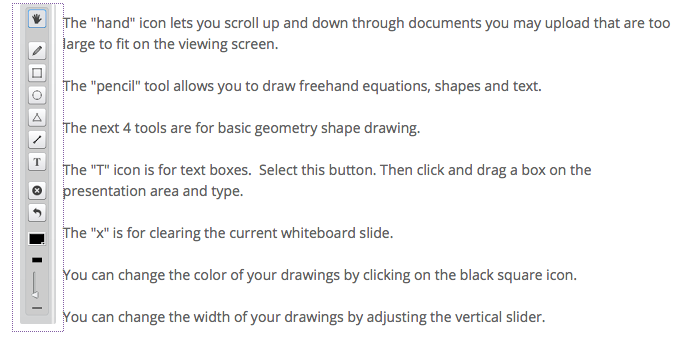
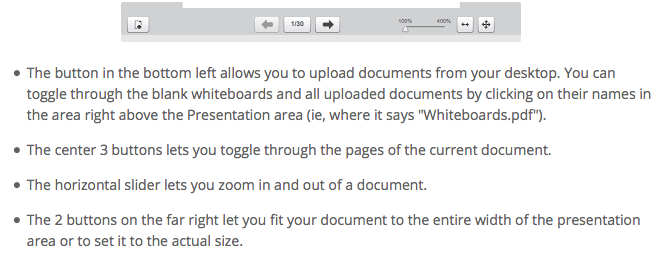
At the bottom of the presentation area, you will see some more tools:
Transferring control to your student
When a session begins between tutor and student, the users box will look like this:
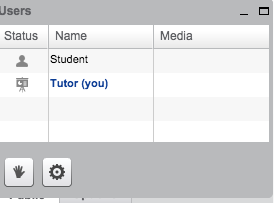
Next to the tutor name, you will see a little Presenter Icon. This icon is what allows your student to see your red highlighter as you highlight over the Presentation Area. It's also what allows you to upload documents and toggle through the slides of a presentation.
If you want your student to have the control to upload a document, you can click next to their name under the status column.
Because you are the tutor of the classroom, you can take back the control whenever you want.
Changing the Layout
In the bottom right corner of the virtual classroom, you will see a dropdown like this:
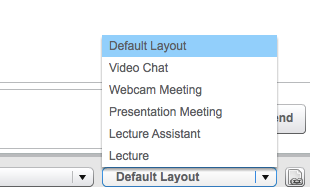
This lets you change the layout of the various modules (users box, presentation area, chat box, etc.) in the virtual classroom. Feel free to play around with your favorites. Our preferred layout is "Presentation Meeting" but only after we know our student is in the classroom with us and ready to go. After selecting this layout, you will want to click on the button next to the dropdown to ensure that your student has the same layout as you.
Tips
How to know if your student has their audio setup
Look at the Users box for the student's name. If you do not see a microphone next to their name, they CANNOT hear you. But you can chat to them in order to get their attention and help them set their microphone up.
How to ensure the vertical toolbar shows up
Sometimes when you hover over the Presentation Area, the vertical toolbar won't appear. Simply click down on the Presentation Area and the vertical toolbar should appear.
Updated less than a minute ago
